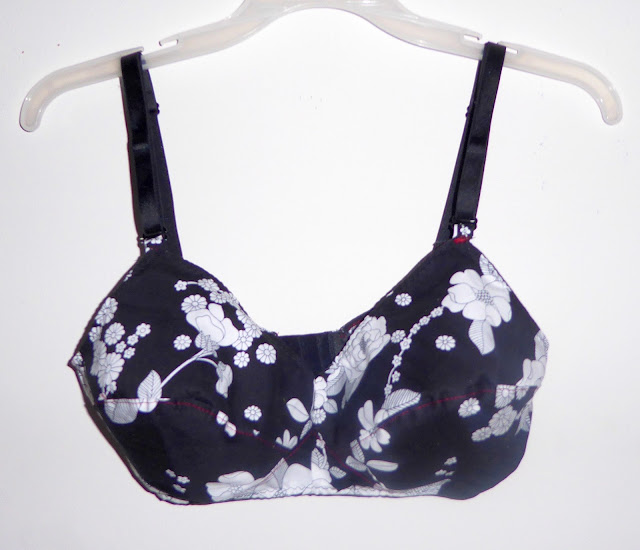
I didn't buy any special bra making fabrics or notions. I just used the remnant stretch woven cotton that was left over from my last floral red carpet dress. For the closure, I bought really cheap bra extenders from the dollar store (3 extenders for $1.5). As for the straps, I just used the removable straps from my strapless bra. I also happened to have narrow black elastic in my stash. I used some contrast threads so that I could see the problems I would encounter in sewing such narrow seams.
I used only 1 layer of fabric for all pieces as this was supposed to be a prototype for fit and practice purposes. The pattern calls for non-stretch fabric for the cups and Powernet for the band. I didn't have Powernet so I decided to just use the same fabric but cut on the bias to allow some slight stretch. It actually worked out well. The next time I make this, I will make sure to add soft lining fabrics to the cups as well as a comfortable but firm fabric at the band.
This style of bra is unusual because bras nowadays almost always separate the 2 breasts with a bridge in the middle. This bra pattern doesn't have that bridge. Also, this style doesn't allow one to add underwires to give more support. So the band at the bottom of the breasts have to be very firm to support the cups. I have personally never worn bras that have non-stretch cups so I suppose it takes some getting used to. But I can see that these can be really lovely, vintage-looking, special occasion bras in beautiful fabrics that one would want to show off.
Here it is on the rack:
And here it is on me. The cups seams have ripples in them so I need to adjust the cups pattern slightly.
The next time I make this bra, I will probably add some soft padding to the cups since the bra pattern doesn't allow underwires. The pattern instructions are not very clear for a beginner bra maker like me. But I somehow figured it out. I am definitely interested in making this again with all the adjustments that I am planning to make. It doesn't take a long time to make as long as I have made all the alterations on the pattern pieces. Looking forward to making my 2nd bra prototype!


It worked out beautifully, and you got a good fit the first time around. I'm still working on that! It's a great little pattern.
ReplyDeleteThanks! Actually there are ripples across the seams of the cup. I think that's because the fit is not quite right. I will need to fix that. I'm looking forward to seeing your bra!
DeleteGreat job, and good thinking on all the ways you found to make it less expensive as a starter garment. Good luck on the tweaks you will be trying.
ReplyDeleteThanks Jenny! I find that I usually most creative when the resources are scarce. My objective was to get the fit right before buying any expensive fabrics/hardware.
DeleteLooks like a great first effort and it looks terrific in that fabric. Bra making is enticing me too but so far not enough to dive in yet.... but soon I hope.
ReplyDeleteThanks! I was also intimidated by bra making and the expensive fabrics/notions/patterns. I was lucky to have found this thrifted bra pattern which spurred me on to make this bra.
DeleteFor the first time making a bra it turned out nice.
ReplyDeleteThanks! It actually has some fit issues that I need to address. They just don't show that much in the photo.
DeleteReally nice bra!
ReplyDeleteThanks! The fit still needs tweaking but I'm happy with this first try!
DeleteSplendid info this is really helping me alot. Sewing Machine Reviews
ReplyDelete