Showing posts with label stash busting. Show all posts

Sunday, December 24, 2017

1950s polka dot circle skirt and Happy Holidays!

I wanted to sew something for myself in December but as usual - Decembers are crazy busy months! Nonetheless, I sewed something for my daughter. Her school's Christmas concert was a 1950's themed performance. I had to make a costume for her that fit the theme. So I just quickly bought some off cut black/white polka dot quilting cotton from my local fabric store. I cut out a simple circle skirt. Then I rummaged through my stash and found some white cotton remnant fabric. I had just enough to make a petticoat. All were sewn together quickly onto a thick black elastic waist band.


I used the same polka dot fabric and tied my daugher's hair into a pony tail. She was really happy with it:

I don't think I'll have time to sew anything else before Dec 31. So I'll be able to do my review of my top 10 sewing projects this year!

Happy Holidays everyone!! Stay safe and merry!


Thursday, November 16, 2017

Nov MAGAM completed! A Reversible Faux Fur Vest

My health is getting better which means More Sewing! The November theme for MAGAM (Make a Garment a Month) group is 'November Needs'. I know my closet well and I know I don't NEED anything else. However, when I looked into my fabric stash, I realized there are a few winter cozy items that I would like to wear this winter.

I thrifted a piece of purple reversible faux shearling in my local thrift store a couple of years ago. I had bit more than 1 metre of it. I love wearing faux fur in the winter. It's cozy and warm and stylish too. My mom-in-law already gifted me a black faux fur vest and a beige faux fur vest years ago. I wore them both frequently in the winter. So an addition of another faux fur vest sounds like a good idea.

I drafted my own vest pattern and started cutting. The fluff was everywhere and I had to wear a face mask during the vest construction. It all came together very quickly. I used lapped seams so that the reversible vest seams looked tidy. I sewed a small zig-zag stitch all the way around all the raw edges to prevent the fur fluff from eroding.


And this is how the reversible vest looks on me:


It's a bit thick and boxy but oh so warm and cozy! I think it will look good with jeans too. And I busted some more stash! Yay!

Thursday, November 9, 2017

After the Lung infection --- Back to sewing!

I have been away from blogging and sewing......because I got a lung infection! I'm still coughing but much recovered. So there was no blogging or sewing for a good few weeks.

I entered the Pattern Review Plaid Fabric contest before the infection. So it had been a mad dash to finish my plaid project in the last couple of days. I chose this very big patterned plaid boucle tweed coating fabric that has been in my stash for a long time:

This fabric has silver threads weaved throughout (difficult to see in this picture). I have used this fabric before to make a pair of cushions that I gave as x'mas gifts. I didn't want to make a coat with this as the Canadian winters are too harsh for such a loose weave coat. So I rummaged through my pattern stash and decided on this:

It seems odd at first glance to use a pattern destined for summery fabrics to make this obviously winter garment. I have never used this pattern before but I thought the simple pull-on, a-line shape would suit my body well. I have made other pull-on a-line dresses before and I wore them frequently.

I chose to make the knee length, 3/4 sleeve version of this dress, omitting the stand collar. I didn't do a muslin but compared the pattern pieces with a tried-and-true pattern to assess the fit. I did my usual short waist and short height adjustment. Fortunately the fit was fine.

The loose weave fabric was not easy to work with. There was terrible fraying, warping, which made matching the plaid pattern a little difficult. The dress has a front chest dart so I concentrated on matching the plaid from the bottom hem to just below the chest dart.

I wanted to 'jazz' up the dress a little with interesting trim. I auditioned various trim and found a bias red poly-cotton trim and cut out some remnant houndstooth plaid in my stash.

I added the red trim first with the frayed houndstooth trim on top. I applied this trim at the bottom hem and the sleeves:

I considered added external pockets to the dress but I think the bright contrasting trims are enough in terms of embellishment. The dress is actually quite warm but heavier to wear than regular dresses. I'll need to test-wear it this week to see how practically it is.


All in all I'm pretty happy with the risks I took in making this dress: 1) using a coating fabrics for a dress; 2) using a summery dress pattern for a heavier winter dress; 3) using a bright red trim with another plaid as trim; and 4) using a big bold print on my short boxy body. Also I busted some serious fabric stash too!

Here is how it looks on me and the plaid matches on the side:


So what do you think? Do you think the trendy plaid is workable for short boxy shaped women?

My review of this pattern is on PatternReview.

Tuesday, August 22, 2017

Self-drafted Craft Show Apron

I have been so busy the last 2 months! The kids are off school so I have been like the drill sergeant for the kids: forcing them to do homework to keep up with what they had learned the previous year, making sure that they get physical activities outside, field trips to museums and nature, entertainment, playdates with their friends, out of town trips, etc. On top of all that, I launched my Handmade Accessories online business in late June. It had been such a steep learning curve in everything. I just had a booth at a local farmer's market last weekend and that was a great learning experience as well.

And soon the kids will be going back to school. Yay! They have actually been asking to go back to school as they miss their friends and the school routines very much. I can't wait for my life to get back to a normal routine as well.

One of the things I sewed for myself in preparation for the craft show is this Craft Show apron. I studied the blogs of other craft sellers and one of the things many thought was useful was a toolbelt-like apron. So I looked into my fabrics scraps and made this:

This apron was made with by refashioning a thrifted denim skirt. I drafted the pattern by placing the necessary tools onto the paper pattern and outlining the pockets for them. The zipper pocket contained the cash, and the various front pockets are for my phone, scissors, scotch tape, measuring tape, square reader, pen, etc. I was so happy to have made that because it was so useful during the farmer's market gig. I can see this being adapted easily to a gardening apron too!

Saturday, June 10, 2017

Is a Summer Tweed Dress to hot to wear?

I had wanted to make a summer tweed dress for a few years now. I tried making one last year and it was a disaster.

So this year, I really want to try to make another one, especially after I have seen this incredible one on Pinterest:

The colour, the various self fabric trims.....it's a magnificent tweed dress! I'm salivating just looking at this picture. Of course I don't have that gorgeous tweed in my stash and I am not buying any new fabrics. So I'll have have to make do with whatever tweed I have. The only question I have is: is it too hot to wear tweed in the summer?

Wednesday, May 24, 2017

More Summer Garments! A Red Linen top

I'm not sure if other sewists do this. I'm quite lazy when it comes to changing the threads on my serger. So when I want to sew something, I always look at what colour threads are already threaded in the serger and then proceed to make something in that colour.

The serger has been threaded with red threads for a while, and I have been making red garments. So to continue with the red trend, I made myself a sleeveless top with the same red linen blend that I used for the cargo shorts I made a few days ago. This top is based on my stash pattern Butterick 5364 which I have used previously.


I used a size 10 because of how 'blousey' this pattern is. But I had to enlarge the armhole as the  size 10 armhole is too tight for me. I also added side slits this time to make it easier for me to sit down without wrinkling the bottom half of the top too much. I didn't use the facing pieces in the pattern but instead used bias tape to enclosed the edges. I found the facing pieces too cumbersome and too warm to wear on a hot, sticky summer day. I sewed a short line of satin stitch right on top of the side slit to stop the slit from splitting from wear and wash.


I'm pretty happy with this top and I can't wait to wear it. Now what else can I do with the remaining red linen blend fabric?

The review of this pattern is at PatternReview.

Tuesday, May 23, 2017

Refashion: Women skirt to Girl Jeans

My daughter has all of a sudden shot up almost 5cm in height this past month. So I needed to make her some new pants for school and play.

I thrifted these 2 women long jean skirts at my local thrift store for $5 each. One of those skirts had a stain on it but I can easily cover it with some applique. The reason I like using 2nd hand denim is that they have already been washed, shrinken, broken in. The fabric is soft and durable at the same time - excellent for kids' clothes:


I used one of my daughter's current too-short pants as a guide and made a pair of jeans that is longer
and wider.


I also used some remnant red linen fabric from my previous project to make a heart-shaped applique for the side pocket. Since the serger was already threaded with red threads from the last project, I simply cut a pocket shape from the jean skirt and serged the edge in red.

The length of the jeans skirt was just a tad bit short of the side length I wanted for my daughter. So I cut a piece of remnant red knit, encased a piece of elastic inside it and serged the whole thing to the top of the pants as the waistband.

I hope my daughter likes it! If so I'll cut the other jean skirt and make another pair of mama-made pants for her. There are still lots of remnants from that first skirt that I can make lots of accessories!

Monday, May 22, 2017

More MAGAM Merry May projects - Red linen Cargo Shorts

It's a 3 day weekend this weekend but I still sewed something! Between forest hiking and visiting National Historic Monuments with the kids, I hid away from them for just enough time to make some new shorts.

I used my tried and true Butterick 5044 that had been tweaked for my body. I made View A in size Small. The red linen blend fabric has been in my stash for years. It's a brilliant true red which I love. The only change I made was to position the side pockets higher than suggested by the sewing pattern.  I used an existing black shoe lace in my stash for the waist tie.

Surely one can always use a pair of linen shorts for the hot and sticky summer! The temperature right now is still in the mid-teens Celsius so I'm not wearing these shorts yet. But I can't wait till I will be able to wear them!

Monday, May 8, 2017

Me Made May 2017 Outfits: May 6-8

Here are my Me-Made May 2017 Outfits for May 6, 7, and 8:

May 6:
I was going to a Confirmation celebration at the church today. I was wearing a me-made wool dress and a me-made chiffon scarf, as well as thrifted ankle boots.


May 7:
It was still cold so I wore my me-refashioned red cashmere jacket, me-made grey stretch woven pants, a thrifted black top, thrifted scarf and a pair of thrifted patent leather pumps.


May 8:
I'm wearing a thrifted merino wool cardigan, a me-made fabric remnant scarf, and me-made red stretch woven slim pants.


I can see a trend in my outfits. I almost always have something red in the me-made outfits. It is my favourite colour so my wardrobe is full of red garments!

Saturday, May 6, 2017

MAGAM May Project 2 - Girl towel dress/deck dress

My kids are a bit spoiled in some ways. They know that if they see some sort of clothing or fabric accessories or soft furnishings that they like, or something that they need at school, they can just ask me to make it. And they would 'demand' it to be made in 24 hours while they were sleeping. Of course I don't promise to make it in 24 hours just because they 'demanded' it! LOL!

A few days ago my daughter saw a girl with a deck dress made with towel-like material and wanted me to make her one. She rummaged through our linen closet and found a large thrifted yellow towel. And she asked me not only a deck dress, but a 'towel princess dress' (whatever that is).

So I simply folded the towel in quarters, cut a hole for the head, use an existing top as a guide and cut out the dress.

Then I serged all the seams and used stash red bias tape to trim the neck line. I made the dress a bit big because I wanted it to last at least 1 year. The neckline was too wide so I made a simple pleat at the back neck edge:

My daughter seemed to like this towel dress very much. She actually danced and pranced in it. More power to her! :-)


Friday, May 5, 2017

MAGAM May project 1 - Girl swimsuit

I was going to make myself something for my MAGAM (Make a Garment A month challenge) May entry. However, my daughter had been pestering me to make her something so I made her 2 things. She has swimming lessons every week and she wanted a new swimsuit. She saw another girl with a deck dress made with towel-like material and she wanted one of those.

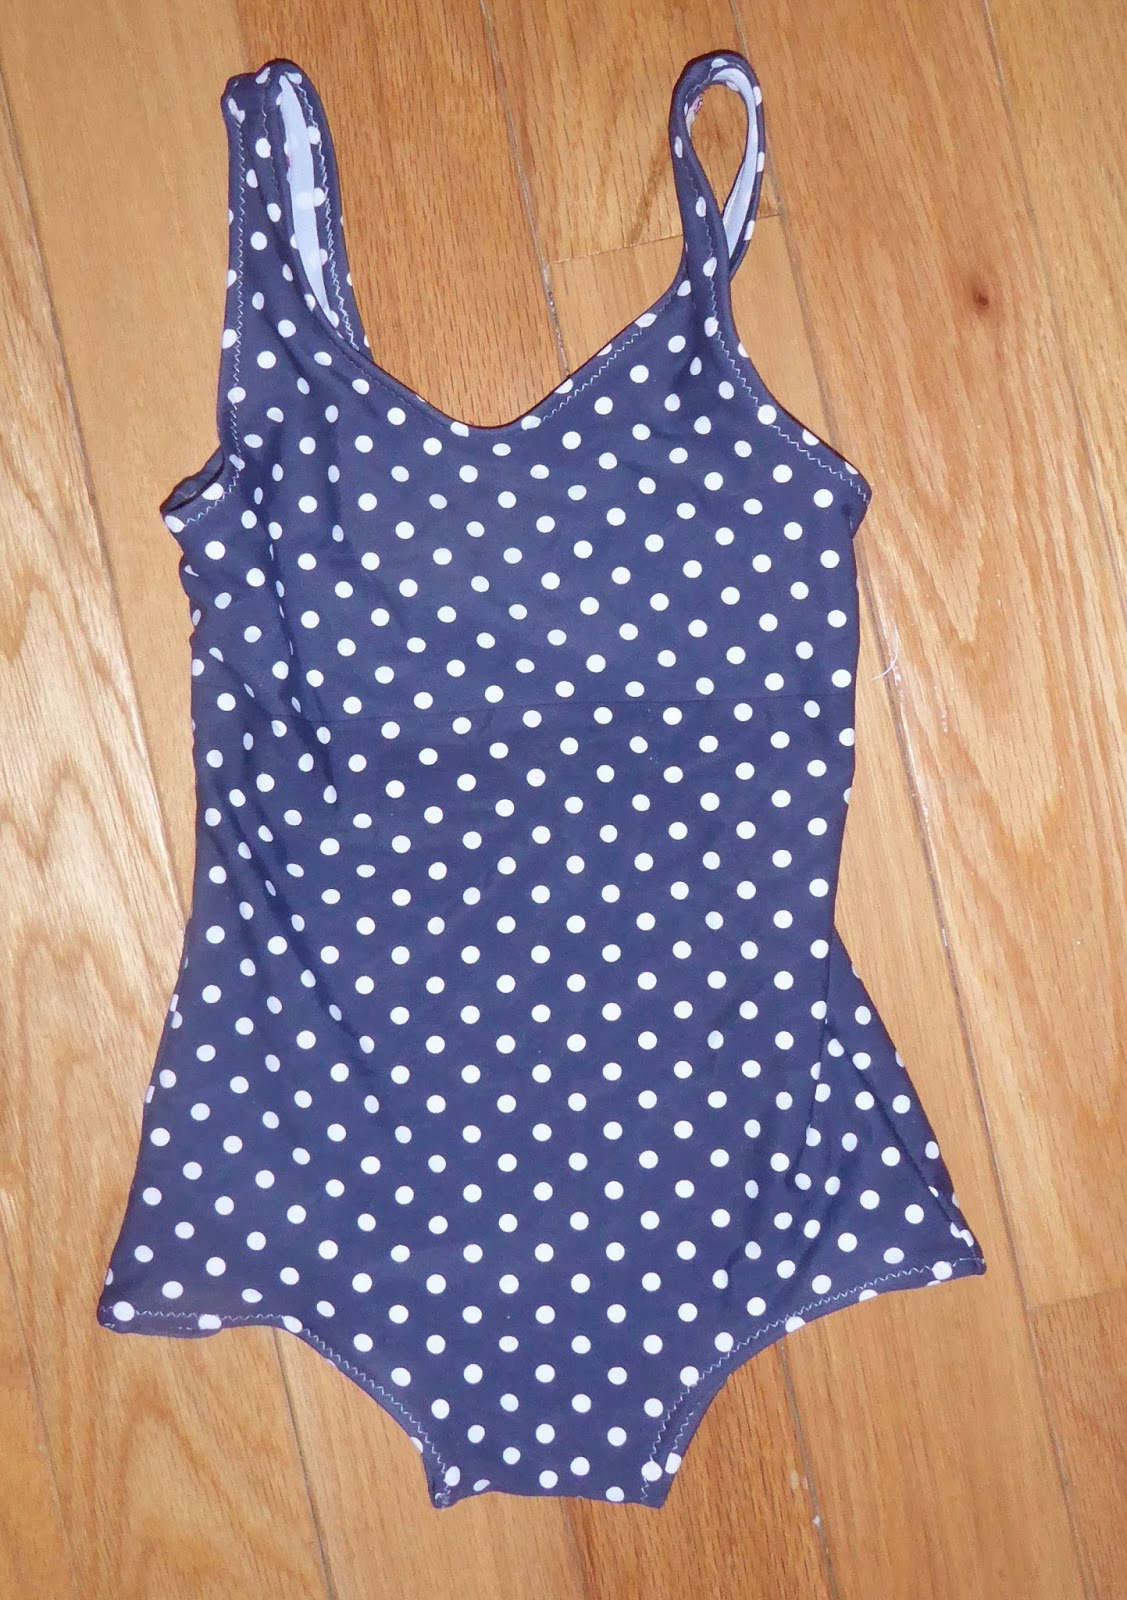
I dug into my enormous fabric stash and found this navy polka dot swimwear fabric. I only had a very small piece of it but it was just enough to make a small child's swimsuit.

I had also just thrifted this very old girl's swimsuit pattern from 1971 for $0.99 at my local thrift store a few weeks ago. The publisher was Knit Knack of Canada. It's called 'Basic Knits #306 Girls' One and Two Piece Bathing Suit':

The patterns were printed on very sturdy paper and there were just 2 pattern pieces. I also like that the swimsuit has very low leg openings. My daughter has a nice full bum so low legged swimsuits are best for her.

It all came together very quickly. I didn't do anything fancy except that I added a full lining to the front piece. I already have swim elastic so I didn't buy anything to make this swimsuit:

I like this simple pattern because one can make modifications or add fancy design details easily. My daughter also does gymnastics so this pattern can be used to make a simple gymnastics leotard as well.

Next I'll be making my daughter a 'towel princess dress' (as she called it) for her swim classes, with one of the towels in my home. Should be interesting!

The review of this sewing pattern is at PatternReview.com.

Me Made May 2017 outfits - May 5

Today is a rainy and dreary day. I decided to just wear something easy and casual. This is a me-refashioned sweatshirt (from a huge  XL sweatshirt). I wore it with a me-made fabric remnant scarf, and thrifted leggings. The pink polka dots fabric pops some life into this dreary day.


Sunday, April 23, 2017

My 2nd Bra prototype - The Maya Bra

I was going to tweak the Sew Lovely Bra that I made last week until I came across the Maya Bra. This is a FREE pattern I came across on Pinterest. AFI Atelier from Romania created this FREE for downloand bra pattern. She provided very good descriptions and instructions on this pattern on her web site. I read some bloggers who have tried this pattern and I thought I could give it a try too.

I couldn't find bra making foam or any bra making notions at my local fabric store. But they carry this 'craft foam' that was about 0.5mm thick. I thought I could try to use this for the foam bra cup.


I thrifted a bunch of bras from my local thrift store to 'harvest' the lingerie notions (straps, elastics, closures).

I used scrap woven cotton that was leftover from my red/white floral tunic, and stash peachy orange knit lining I used for my friend's dress to line the cups. I used 2 layer of the same lining for the back bands. This prove to be an error as this lining is durable but not stretchy enough. I used salvaged shoulder straps from a thrifted bra that were too short.

Even with detail instructions, I managed to made many mistakes that required me to rip out the stitching and elastics over and over again. I thought I was going blind! :-) The bra is not, unfortunately a wearable muslin. The back band is too tight, the shoulder straps are too short, the bridge is still a tad too wide even after I altered it, and the elastics were not pulled tight enough on the side of the cup. However, the cups themselves fit well enough. And with all the stuff that I have learned in making this prototype, I should be able to make a wearable bra next time with the correct notions and proper fabrics.


I think this bra can be made into a very good swim bikini top with swimwear fabrics and notions. I have lots of stash swimwear fabrics and notions. Perhaps I should try making that next!

Monday, April 10, 2017

I sewed my first Bra! Sew Lovely B70 Prototype

I just finished my first bra prototype! I used this thrifted Sew Lovely B70 pattern from 1970.


I didn't buy any special bra making fabrics or notions. I just used the remnant stretch woven cotton that was left over from my last floral red carpet dress. For the closure, I bought really cheap bra extenders from the dollar store (3 extenders for $1.5). As for the straps, I just used the removable straps from my strapless bra. I also happened to have narrow black elastic in my stash. I used some contrast threads so that I could see the problems I would encounter in sewing such narrow seams.

I used only 1 layer of fabric for all pieces as this was supposed to be a prototype for fit and practice purposes. The pattern calls for non-stretch fabric for the cups and Powernet for the band. I didn't have Powernet so I decided to just use the same fabric but cut on the bias to allow some slight stretch. It actually worked out well. The next time I make this, I will make sure to add soft lining fabrics to the cups as well as a comfortable but firm fabric at the band.

This style of bra is unusual because bras nowadays almost always separate the 2 breasts with a bridge in the middle. This bra pattern doesn't have that bridge. Also, this style doesn't allow one to add underwires to give more support. So the band at the bottom of the breasts have to be very firm to support the cups. I have personally never worn bras that have non-stretch cups so I suppose it takes some getting used to. But I can see that these can be really lovely, vintage-looking, special occasion bras in beautiful fabrics that one would want to show off.

Here it is on the rack:

And here it is on me. The cups seams have ripples in them so I need to adjust the cups pattern slightly.

The next time I make this bra, I will probably add some soft padding to the cups since the bra pattern doesn't allow underwires. The pattern instructions are not very clear for a beginner bra maker like me. But I somehow figured it out. I am definitely interested in making this again with all the adjustments that I am planning to make. It doesn't take a long time to make as long as I have made all the alterations on the pattern pieces. Looking forward to making my 2nd bra prototype!

Thursday, April 6, 2017

Trying something NEW - Making a Bra!

I  have made many different garments for myself and my family/friends over the years. There were some 'firsts' that I were really proud of: welt pockets, men's coat, swimsuits, underwear, etc. The one thing that I had always wanted to make but was always intimidated by: making a bra for myself.
I had researched on and off on the web regarding how to make well-fitting bras. However, each post I read about bra making, it seemed to require ordering special bra patterns, special (and usually expensive) bra making fabrics and notions. Since I already have well fitting RTW bras, I didn't want to invest too much into making something that might not fit.

What a lucky coincidence that I found this very vintage, 1970 bra making pattern at my local thrift store:

These 2 uncut, pristine patterns together cost me $1.99. Sew Lovely Lingerie patterns don't exist anymore. And their fabric requirements printed on the pattern envelope were difficult to translate into modern man made fabrics. I have found some useful info online from others who have bought these patterns too.  However, I haven't found anyone who has actually sewn with these patterns yet.

So this will be my April MAGAM (Make a garment a month) project. I'm going to attempt the bra only as I have already drafted well fitting panties pattern for myself. If all goes well, perhaps I will look into investing in some proper bra making fabrics and notions. Wish me luck!

Monday, April 3, 2017

MAGAM March garment - Vogue 8190 Floral Dress

I have been away from the blogsphere for a while - family illness, travel, family illness, etc. Now I'm back. I have finished the March MAGAM (Make a Garment a Month) themed dress. The theme was 'Movie Make'. I decided to use one of my stash pattern Vogue 8190 to make a 'red carpet style' dress. I found this black and white floral stretch cotton woven in my stash that had been there for 8 years. I never knew what to do with it until now.

The pattern is a ruched front, strapless gown. Strapless gowns can be a bother because they always conform to gravity (i.e. slipping down slowly) so I decided to add straps to this dress. Also, the floral cotton fabric was busy enough without having to ruch it. I decided to just use the lining pattern pieces to make a simple dress with flounced hem.


I used my usual size 14 but the chest area needed some adjusting. I did my usual short waist adjustment. The dress wasn't difficult to sew without the ruching. It was actually easier to make body adjustment using just the lining pattern pieces. I chose the shorter length flounce instead of the longer one because I was hoping to actually wear this to a dinner date. I added 5 strips of boning in the foundation garment. I also added firm cups in the chest area. However that length just below the knee seems to make me look even shorter. Perhaps the longer, floor length would have been the better choice.


I realized that the floral fabric is great in camouflaging the lumps and bumps on my body. However, it also creates a generally heavier, fuller look. So I decided to add a black belt and see if it could define the waist better:


I think it defines the waist a little better. In a way, I think that 'Santa Claus Belt' actually make the dress a bit more casual looking so that I can actually wear it for a family brunch as well as to a wedding as a guest.

In general this pattern is okay the way I have used it. The length to me is not the most flattering so that can be remedied by shortening the length or by using the longer flounce. I think this pattern can be used for a very nice wedding gown or wedding guest dress.  I'm not sure if I will use this again as I have tonnes of other uncut patterns that I haven't tried yet in my stash.

My review of this pattern is at PatternReview.